Top 10 Reasons Your Window Screen Is Not Fitting Well?

Time:2026-09-20 Author:Sienna
0%

A window screen should sit squarely in its frame, move smoothly, and remain secure when the window opens. Yet even a recently installed screen can bow, rattle, or leave a narrow gap along one corner. If you are asking, “Why is my window screen not fitting well,” the answer may involve more than the screen itself. Frame measurements, worn corners, bent rails, damaged springs, and seasonal movement can all affect the fit.

Small details matter. A two-millimeter gap may admit insects, while a twisted frame can create pressure against the window track. In my experience, many homeowners blame the mesh first. That is not always correct. The frame may have shifted during storage, or the retaining clips may no longer hold their original tension. Dust inside the track can also prevent a screen from seating completely. Simple, but often overlooked.

This guide explores the ten most common reasons a window screen fits poorly. It explains what to inspect, which symptoms reveal each problem, and when a repair is practical. You will learn how to compare diagonal measurements, check frame squareness, and test corner hardware without forcing it. Measure twice. Replace parts carefully. A screen that looks acceptable from across the room may still fail at the edges.

Some explanations may not apply to every window design. Older aluminum frames, modern vinyl systems, and custom screens behave differently. That limitation matters. Reliable troubleshooting starts with the actual frame, not a quick guess. With careful observation and basic tools, most fitting problems become easier to identify and correct.
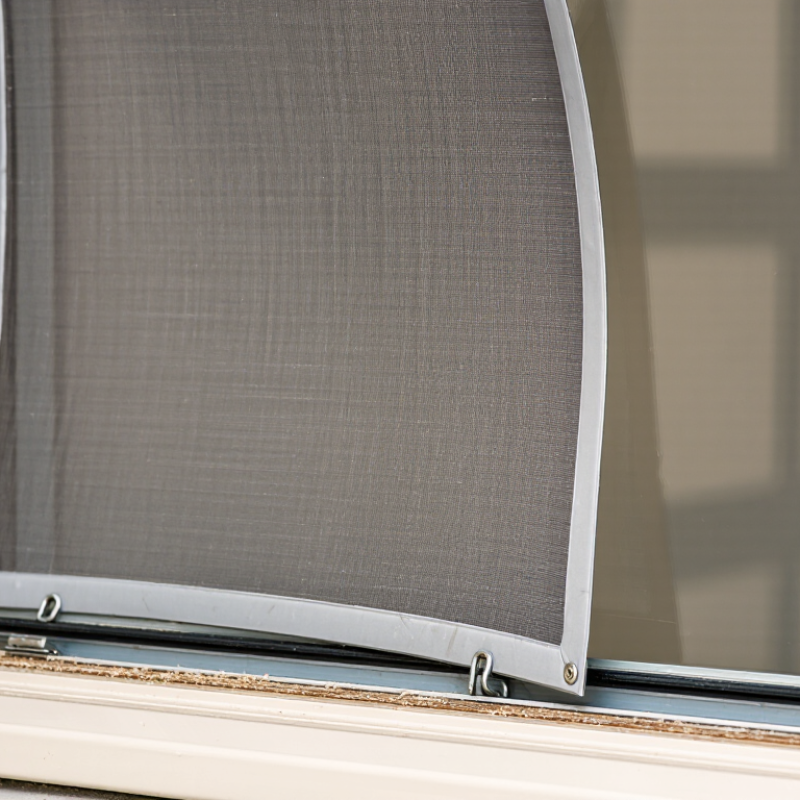
Top 10 Reasons Your Window Screen Is Not Fitting Well?

Measure Width, Height, and Squareness Within the 1/8-Inch Fit Tolerance

Top 10 Reasons Your Window Screen Is Not Fitting Well?

Measure Width, Height, and Squareness Within the 1/8-Inch Fit Tolerance

A loose or stubborn window screen often begins with inaccurate measurements. Measure the opening’s width at the top, middle, and bottom. Then measure height on the left, center, and right. Record the smallest width and height, not the largest. A frame can look straight while being slightly narrower near one corner.

Check squareness with the two diagonal measurements. Ideally, they should differ by no more than 1/8 inch. That tolerance matters. If the difference is greater, the opening may be racked, the frame may be twisted, or old sealing material may be interfering. Clean dust, paint buildup, and insects from the channel before measuring again.

Small hardware problems also affect fit. Bent springs, worn corner keys, damaged spline, or an incorrect frame depth can prevent proper seating. Measure from the actual contact surfaces, not from the outside edge of the trim. I have seen careful measurements fail because the tape was held at an angle. It happens.

Do not force it. A forced screen may bow, leave gaps, or damage the frame. Recheck the measurements with a rigid tape and write down each result immediately. If the opening changes by more than 1/8 inch, a standard rectangular screen may need adjustment, although the window itself should be inspected carefully.

Check Frame Bowing, Warping, and Diagonal Differences Against Industry Limits

A screen can look correctly sized and still refuse to seat. In field inspections, I often find frame movement before a bad opening. Bowing creates a gap at the center. Warping twists one corner out of plane. Unequal diagonals show that the frame is no longer square. Heat, storage pressure, loose corners, and uneven spline tension can cause these problems.

Measure the frame on a flat surface. Do not measure it while holding the screen in place. Check both long edges and compare the center points. Then measure each diagonal, corner to corner. Many installers use 1/8 inch as a practical limit for small residential screens. However, no universal industry limit exists. Material, frame size, and published tolerances must be considered. A larger diagonal difference can stop clips from engaging. It may also leave a visible daylight gap. Do not force the screen. I once adjusted the opening first and regretted it. The screen itself was twisted.

Tips: Support long frames at several points during inspection. Mark the high corner with removable tape. If bowing exceeds about 1/8 inch, request a repair assessment. Recheck both diagonals after tightening the corners. Small errors may disappear under pressure, then return after installation. That detail is easy to miss.

Match Mesh and Spline Sizes, Including Common 18×16 Mesh and 0.125-Inch Spline

Top 10 Reasons Your Window Screen Is Not Fitting Well?

A poor fit often begins with mismatched mesh and spline sizes. The common 18×16 mesh has eighteen openings across one inch and sixteen vertically. However, its fabric thickness can vary. That thickness changes how tightly it sits inside the frame channel. A 0.125-inch spline, equal to one-eighth inch, may fit one screen but feel loose in another. Measure the channel, not just the old spline. Old rubber can shrink, flatten, or harden over time.

Clean the channel before installing anything. Dust and dried adhesive can raise the spline slightly, leaving waves near the corners. Use a caliper when possible, then test a short spline section by hand. It should press firmly without forcing the frame outward. I have seen installers choose a larger spline for stronger tension, but that can bow thin frames. Too much pressure is not a quality improvement.

The mesh must also match the channel depth and frame condition. A torn frame corner, bent edge, or uneven cut can make accurate sizing useless. Keep the mesh flat, but avoid stretching it aggressively. Secure two corners, check the pattern, and roll the spline gradually. Small wrinkles may disappear later, though I would not rely on that. One assumption worth reconsidering is that every 18×16 mesh needs the same spline. It does not. Test the fit before trimming excess material.

Inspect Corners, Springs, Latches, Clips, and Screen-Track Clearance

Top 10 Reasons Your Window Screen Is Not Fitting Well?

A loose screen often starts with a small corner problem. Inspect all four corners before replacing the frame. Bent corners can prevent the screen from sitting squarely in the track. Press each corner gently and watch for movement. A displaced spring may also create uneven pressure. The spring should contact the frame without scraping or twisting. Check latches and clips for cracks, weak tension, or missing pieces. They must hold the screen firmly, not merely touch it.

The U.S. Department of Energy estimates air leakage can represent 5% to 30% of household heating and cooling energy use. A poorly seated screen does not cause all that leakage, but it can signal wider window-maintenance issues.

Track clearance is easy to overlook. Dust, paint buildup, or a bent channel can reduce usable space by only a few millimeters. That may be enough to block installation. Clean the track, then measure its depth at several points. Do not assume both sides match. In field inspections, I have found replacement screens installed with the correct width but the wrong frame thickness. That mistake looks like a hardware failure. It is not. Also check whether the springs compress fully and whether clips align with their receivers. I sometimes recheck a screen after closing the window, because the sash can shift its position. A quick visual inspection can mislead.

Evaluate Aging, UV Exposure, Seasonal Expansion, and ASTM D3656 Compliance

Top 10 Reasons Your Window Screen Is Not Fitting Well?

Aging is a frequent cause of poor screen fit. Aluminum frames can bend slightly after years of handling, cleaning, or repeated removal. The spline may also shrink, harden, or loosen inside its channel. I have found that a screen can look square while its diagonal measurements differ by several millimeters. That small error creates corner gaps and uneven tension. Measure both diagonals before replacing the mesh.

UV exposure weakens many screening materials over time. Constant sunlight can make fiberglass brittle, fade the coating, and reduce tear resistance. Touching the mesh may leave a permanent crease. Do not judge condition by appearance alone. A flexible sample can still hide weakened fibers. Checking product records and installation age is more reliable than guessing.

Seasonal expansion adds another complication. Frames and mesh respond differently to heat, cold, and humidity. A screen installed tightly during a cool morning may bow during summer heat. ASTM D3656 provides performance requirements for insect screening and louver cloth, including material and construction characteristics. However, compliance does not guarantee a perfect frame fit. Confirm the exact mesh type, dimensions, and spline compatibility. A careful installer should inspect corners, channel depth, tension, and frame squareness. I sometimes see over-tightening used as a quick fix, but it can distort the frame. The better answer is not always a new mesh; sometimes the frame needs correction.

FAQS

Why can a correctly sized screen still refuse to fit?

The frame may be bowed, warped, or no longer square. Heat, storage pressure, loose corners, and uneven spline tension can cause movement. Do not force it.

How should I check whether a screen frame is square?

Place the frame on a flat surface. Measure both diagonals from corner to corner. Compare their lengths. Unequal diagonals indicate a distorted frame.

What diagonal difference is acceptable?

Many installers use 1/8 inch as a practical limit for small residential screens. However, no universal limit applies. Check the material, size, and published tolerance.

How can bowing affect screen installation?

Bowing creates a center gap and may stop clips from engaging. Support long frames at several points during inspection. Mark the high corner with removable tape.

Does every 18×16 mesh require 0.125-inch spline?

No. Mesh thickness and channel depth can vary. A 0.125-inch spline may fit one frame but feel loose in another. Test a short section first.

How do I choose the correct spline size?

Measure the channel, not only the old spline. Old rubber may shrink, flatten, or harden. The spline should fit firmly without pushing the frame outward.

What should I inspect before replacing the entire frame?

Check all four corners, springs, latches, clips, and track clearance. Look for cracks, bent edges, weak tension, or missing parts. Small defects matter.

Why might the correct screen width still fail during installation?

The frame thickness may be wrong, or dust and paint may reduce track clearance. Measure the track depth at several points. Both sides may differ. I once trusted a quick visual check, and it was not enough.

Conclusion

Why is my window screen not fitting well? The most common causes are inaccurate measurements, a bowed or warped frame, and differences between the screen’s diagonals. Measure the width and height at several points, check that the opening is square, and aim to stay within a 1/8-inch fit tolerance. A frame that has changed shape from age, heat, moisture, or seasonal movement may also prevent a smooth installation.

Fit can also be affected by mismatched mesh and spline sizes, such as pairing common 18×16 mesh with an unsuitable 0.125-inch spline. Inspect the corners, springs, latches, clips, and the clearance inside the screen track for damage, looseness, or obstruction. Finally, consider UV exposure and material aging, which can weaken the screen and reduce dimensional stability. Comparing the screen’s condition and construction with applicable performance guidance, including ASTM D3656, can help identify whether adjustment, repair, or replacement is the best solution.

Sienna

Sienna

Sienna is a skilled marketing professional with a deep expertise in our company’s core products and services. With a passion for innovation and detail, she plays a pivotal role in crafting insightful blog posts that not only highlight the unique features of our offerings but also provide valuable......