China Top Window Screen How to Replace a Window Screen?

Time:2026-09-15 Author:Charlotte
0%

A torn window screen invites mosquitoes, dust, and frustration into an otherwise comfortable room. Learning How to replace a window screen at home can solve the problem with basic tools, careful measurements, and a quiet work surface. A roll of fiberglass mesh, replacement spline, scissors, and a spline roller are usually enough. The repair is small. The details are not.

The U.S. Department of Energy’s Energy Saver guidance reports that windows can influence roughly 25% to 30% of household heating and cooling energy use. A secure screen supports natural ventilation while helping residents keep windows open when outdoor conditions permit. The U.S. Environmental Protection Agency also emphasizes ventilation as one part of healthier indoor air management. Screens do not create energy savings alone, but they make fresh-air habits easier. That distinction matters.

Home-improvement expert Bob Vila offers a practical rule: “Measure twice, cut once.” It fits this repair perfectly. Measure the inside groove, not the damaged fabric. Lay the frame flat. Keep the mesh slightly firm, never drum-tight. Press the spline gradually around each corner. A rushed corner can warp the frame.

The first attempt may look uneven. That is normal. Patience matters more than strength. A replacement screen should sit flat, close cleanly, and resist gentle fingertip pressure. If the frame is bent or corroded, replacing the entire unit may be wiser. Small repairs still deserve honest judgment.
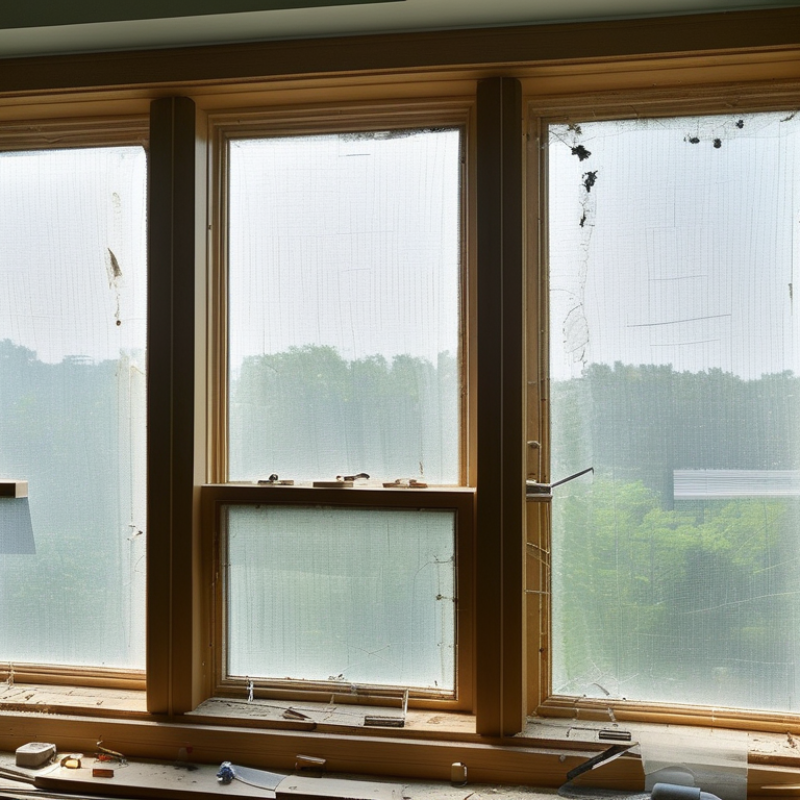
China Top Window Screen How to Replace a Window Screen?

Window Screen Types and Replacement Requirements

Window Screen Types and Replacement Requirements

Window screens protect indoor spaces from insects while allowing ventilation and daylight. Common choices include fiberglass mesh, aluminum mesh, stainless steel mesh, and solar screening. Fiberglass feels flexible and resists corrosion, but it can tear more easily. Aluminum mesh offers better stiffness, although it may crease during installation. Stainless steel suits demanding areas, but it usually costs more. Solar screens reduce glare and heat, yet they can limit airflow slightly.

Replacement requirements depend on the window frame, mesh type, and damage level. Measure the screen opening at several points, because older frames may not be perfectly square. Record the smallest width and height. You may need replacement mesh, a compatible spline, a spline roller, scissors, and a flat work surface. The new mesh should overlap each edge by about two inches. Press the spline evenly without stretching the fabric too tightly.

Check the frame corners and retaining channels before installing anything. Bent channels can prevent a secure fit. Wear cut-resistant gloves when trimming metal mesh. I once pulled fiberglass mesh too firmly, and the finished screen looked neat but bowed inward. That mistake taught me to apply steady, moderate pressure. A loose spline can let insects enter, while excessive tension can distort the frame. Inspect the completed screen from both sides, then test its fit before returning it to the window.

Window Screen Types: Typical Mesh Dimensions

Mesh size is expressed as the number of openings per inch. Fiberglass and aluminum screens commonly use an 18 × 16 mesh, while pet-resistant and solar screens may use different mesh patterns to provide greater durability or reduce solar heat and glare.

  • Measure the existing screen frame width, height, and diagonal before ordering replacement material.
  • Confirm the spline diameter and replace damaged spline if it no longer holds the mesh securely.
  • Choose a mesh material suitable for the window location, ventilation needs, and exposure to pets or sunlight.
  • Keep the replacement mesh slightly larger than the frame, then trim the excess after installation.

Tools and Materials for a Window Screen Replacement

Replacing a window screen starts with the right tools and materials. A tape measure helps confirm the frame size before purchasing mesh. Measure the opening twice, including its width and height. I still recheck these numbers because a small error can waste material.

Prepare a spline roller, a flat screwdriver, sharp scissors, and a utility knife. Wear work gloves and safety glasses when cutting old mesh. You will also need replacement screen mesh, new spline, a clean cloth, and mild soapy water.

Fiberglass mesh is flexible and easy to handle. Aluminum mesh offers firmer support but can crease during installation. Choose material that matches the frame and local weather conditions.

Clean the frame before fitting anything. Dust can prevent the spline from sitting securely. Lay the mesh over the frame, leaving several centimeters around each edge. Press the spline into the channel with the roller, keeping the mesh gently tight.

Too much tension may bend the frame. Too little creates wrinkles. I once pulled the mesh too hard and had to remove one entire side. That mistake taught me to work slowly around the corners.

Trim the extra mesh with a sharp utility knife after the spline is fully seated. Check the edges by hand. A loose section needs correction before the screen returns to the window.

Removing the Damaged Screen and Inspecting the Frame

Replacing a window screen begins with careful removal, not force. Place the frame on a clean, flat table. Wear cut-resistant gloves, especially when old mesh has sharp, curled edges. Use a small flat tool to lift the spline from one corner. Pull the spline slowly, keeping it intact for size reference. If the screen is stapled or clipped, photograph each attachment before loosening it. Work slowly.

Remove the damaged mesh and brush loose dirt from the frame. Inspect every corner, channel, and joint under bright light. Look for bent rails, cracked corners, rust bubbles, or channels packed with grit. A frame may look straight but still twist on the table. Measure both diagonals; they should be nearly equal. Also check the frame against the window opening without forcing it. For metal frames, light surface oxidation may clean away, but deep corrosion weakens the groove. For plastic frames, whitening or splits often signal brittle material.

I once reused a frame that seemed acceptable, and the new mesh sagged within weeks. The hidden bend was easy to miss. That mistake taught me to inspect the channel before ordering replacement material. Record the frame’s outside width, height, and spline diameter at several points. Do not assume opposite sides match. Small differences matter during installation. If a corner separates or the channel cannot hold the spline firmly, replace the frame or consult a qualified window professional.

Installing New Screen Mesh with Spline

Replacing a window screen starts with careful measurement. Remove the frame and place it on a clean, flat surface. Inspect the corners for cracks before removing the old mesh. A blunt screwdriver can lift the old spline without damaging the channel. Brush away dust, dry leaves, and hardened debris.

Lay the new screen mesh over the frame, leaving extra material on every side. Press one corner of the spline into the channel by hand. Use a spline roller to push the cord evenly around the frame. Keep the mesh lightly stretched, but do not pull it aggressively. Excess tension can bend the frame or create distorted corners. My first replacement was too tight, and the mesh looked neat until the frame was installed. That mistake taught me to check alignment after every side.

It is easy to rush. Cut the spline only after reaching the starting point, then press the final section firmly into place. Trim excess mesh with a sharp utility knife, keeping the blade against the frame edge. Check for loose areas, wrinkles, and gaps in the channel. A small wrinkle may disappear after installation, but large folds usually require removing and resetting the spline. Test the frame in the window before securing it, especially if the opening is older or slightly uneven.

Refitting the Screen and Checking Its Fit

Refitting the Screen and Checking Its Fit

A replacement window screen should sit evenly inside the frame, without pressure points or visible gaps. Measure the opening twice, then compare those measurements with the screen frame. A difference of only two millimeters can create a loose corner. Clean the channel before refitting. Dust often hides small distortions.

Place the upper edge first, then press the lower edge into position. Use a flat spline tool, not a screwdriver. A screwdriver can cut the mesh or deform the channel. Check that the spline remains continuous around every corner. The mesh should look firm, but not stretched like drum skin. My first fitting was slightly too tight. It bowed in warm afternoon sunlight. That mistake still matters.

Test the fit by opening and closing the window several times. Inspect each corner from inside and outside. Look for daylight, movement, or a frame that rattles when touched.

The U.S. Department of Energy reports that windows can represent 25–30% of residential heating and cooling energy use. A screen does not provide that insulation, but a poor fit can interfere with operation and ventilation. Insect-screen guidance commonly uses mesh counts such as 18 by 16 openings per inch, though local insects and airflow needs may differ.

Record the final measurements for future repairs. Recheck after a week. Frames can settle, and small gaps are easy to miss.

FAQS

What types of window screen mesh are commonly available?

Fiberglass mesh is flexible and corrosion-resistant, but it tears more easily. Aluminum mesh feels stiffer but may crease. Stainless steel handles demanding areas and costs more. Solar screening reduces glare and heat, though airflow may decrease slightly.

How should I measure a replacement window screen?

Measure the opening at several points. Older frames may be slightly uneven. Record the smallest width and height. Measure twice. Small errors waste material.

What tools and materials are needed?

Prepare replacement mesh, compatible spline, a spline roller, scissors, a utility knife, gloves, and safety glasses. Keep a tape measure nearby. A clean, flat table helps.

How much extra mesh should I leave around the frame?

Leave about two inches of mesh beyond every edge. Place it evenly over the frame. Do not stretch it tightly before pressing the spline.

How do I remove damaged screen mesh safely?

Place the frame on a flat surface. Lift the spline from one corner with a small flat tool. Pull slowly. Old metal edges may be sharp, so wear cut-resistant gloves.

What should I inspect before installing new mesh?

Check corners, rails, joints, and retaining channels under bright light. Look for bends, cracks, rust bubbles, grit, or separated corners. Measure both diagonals. They should be nearly equal.

How tight should the replacement mesh be?

Keep the mesh gently tight while pressing the spline evenly. Excessive tension can bow the frame. Loose tension creates wrinkles and gaps. Moderate pressure works better. I learned this the hard way.

When should the entire screen frame be replaced?

Replace the frame when corners separate or the channel cannot hold the spline securely. Deep corrosion may weaken metal grooves. Splits and whitening can indicate brittle plastic. A neat frame can still hide a bend.

Conclusion

Replacing a window screen is a practical home maintenance task that can improve ventilation while keeping insects outside. This guide explains window screen types and the basic requirements for replacement, including fixed, sliding, and removable screens. Before starting, prepare a replacement mesh, spline, a spline roller, scissors or a utility knife, a flat tool, and a clean work surface. Choosing mesh that matches the frame size and intended use will help ensure a reliable result.

For anyone wondering How to replace a window screen at home, begin by removing the damaged screen carefully and inspecting the frame for bends, dirt, or loose corners. Measure and cut the new mesh with a small overlap, position it evenly, and press it into the frame channel with the spline. Trim away excess material, then refit the screen into the window. Finally, check that it sits securely, opens and closes smoothly, and remains evenly tensioned without wrinkles or gaps.

Charlotte

Charlotte

Charlotte is a seasoned marketing professional with a deep understanding of the company's portfolio and a passion for elevating its presence in the market. With a keen eye for detail and a commitment to excellence, she ensures that our professional blog is regularly updated with insightful articles......